


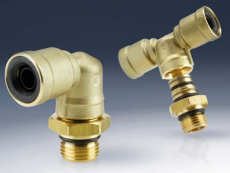
The "Swivel" assembly exists out of 2 or 3 components:
1) "swivel"-stud
2) female "swivel" counterpart
3) anti-rotation lock (optional)
 |
The "Swivel" assembly exists out of 2 or 3 components: 1) "swivel"-stud 2) female "swivel" counterpart 3) anti-rotation lock (optional)
|
|
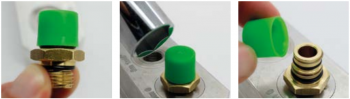
Mount the stud onto the port (please refer to the maximum torque forces on the previous pages). We recommend removing the cap immediately before you mount the female part to the stud in order to prevent dirt on or damage to the O-rings. |
 |
|
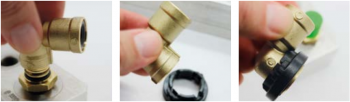
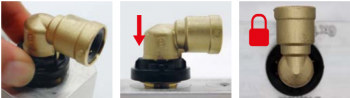
Position the female part on the stud. If you want to use an anti-rotation lock, attach this to the female part before you connect to the stud. |
 |
|
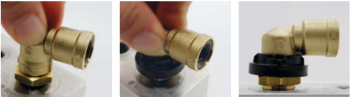
Now press down the upper part completely. The assembly is now complete. Note: This connection cannot be disassembled again. |
 |
|
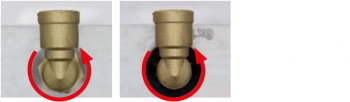
The swivel connector is now completed and ready for the the tube to be inserted. The connector can be rotated to the necessary position (360° swivelling). If you have added a rotation lock and the connector is still swivelling, this is because you have not yet engaged the lock. |
 |
|
To engage the rotation lock, bring the upper part to a position that lets you press it down to interlock with the hexagon of the stud. Then press the locking ring down. The connector is now fixed in position. Attention: The lock is a positioning support for line routing. It is not meant to withstand excessive bending forces. |
 |
